
I'm dreaming of a red, aqua, & white christmas
just like the ones I used to know
Where the treetops glisten & children listen
to hear sleigh bells in the snow....
This year I decided to go with
RED AQUA & WHITE
colors for my christmas tree this year.
Here's a lil inspiration I found for it...


You wanna know whats funny? I used to have a tradition of getting my kids ornies for
xmas every year. so my tree was always the same, I never changed themes , and most of it was
special ornies ( 4 kids every year... you do the math lol)
when the kids all moved out, I started changing my tree. and I always say Im not going to.
but pintrest is a bad influence.I see stuff i like then start changing it again lol
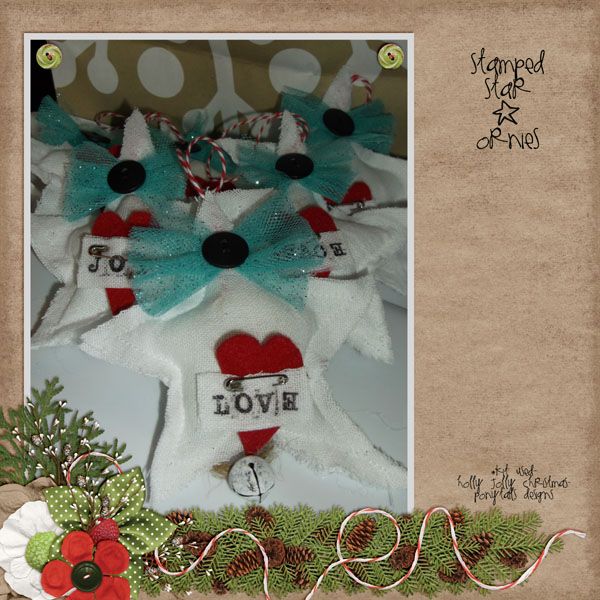
todays MAKE it Monday is going to be some new ornies I just made, I'll call them...
Stamped star ornies!
Here was my inspiration for these beauties...

These are for sale. you can click on image to be brought to
their etsy site!
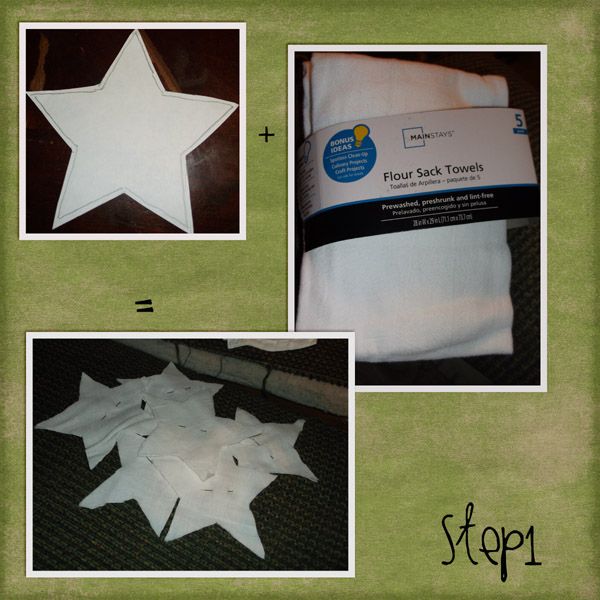
okay so here's what ya'll need
*fabric- they used burlap, I used flour sacks
*small safety pins
*bells
*buttons
*tulle
*felt
*stuffing
*twine - i also used bakers twine
tools- sewing machine, star template, needle , thread, scissors
Here we go....
Step 1~ First draw a star template. Your gonna have to cut 2 for every ornie you make. I made 6 so I needed 12. Trace & cut out your stars.
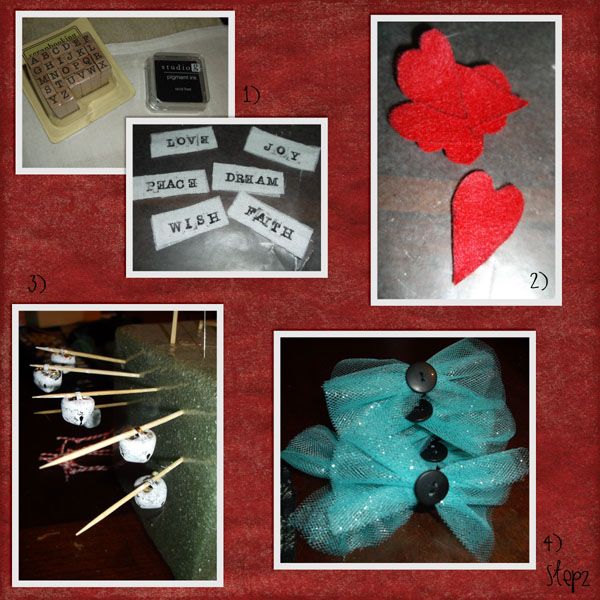
Step 2~ Now let's get your embellishments all done.
I cut out 6 small rectangles from left over flour sack material. & stamped words on them...
love, peace, joy, dream,wish & faith... you can put what ya want on em.
I then took some red felt & cut out 6 hearts. make sure its not going to cover too
much of your star.
I took my rectangled stamped material and used small safety pins to pin them to the hearts.
I bought a bag of gold & silver bells but I wanted mine vintagey looking, so I took acrylic paint and
I sponged it on the bells, not covering all of them.
Next I took my tulle and measured how big I wanted them and sewed a button on the
middle like a bow.( when I was putting them together I decided I wanted them smaller
so I cut parts of them off to make them smaller)
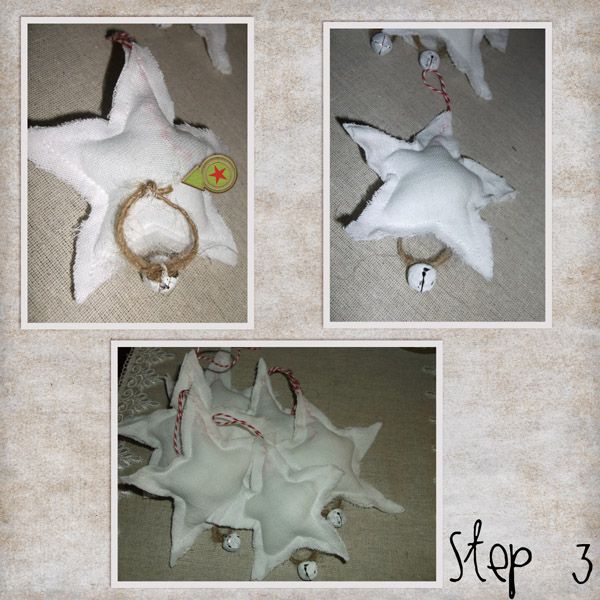
Step 3~
Now it's time to sew these together. I took my baker's twine and made 6 loops for the hangers, and put them on when Isewed them so they were secure. I started at the bottom & sewed around the edges leaving about 1/4 inch on outside. When I got to the bottom, while it was still on sewing maching. I stuffed them. I used a shish kabob stick to push some in the star points. I didn't fill them all the way.
Now it's time to sew these together. I took my baker's twine and made 6 loops for the hangers, and put them on when Isewed them so they were secure. I started at the bottom & sewed around the edges leaving about 1/4 inch on outside. When I got to the bottom, while it was still on sewing maching. I stuffed them. I used a shish kabob stick to push some in the star points. I didn't fill them all the way.
Just enough to give them some puff. then finished sewing them closed.
Now I put my bell on twine & knotted them making loops.
Since you can't see the back I just hand sewed them to the back with some needle & thread.
As you can see in the picture.
Step4~ hot glue your heart embellies on...
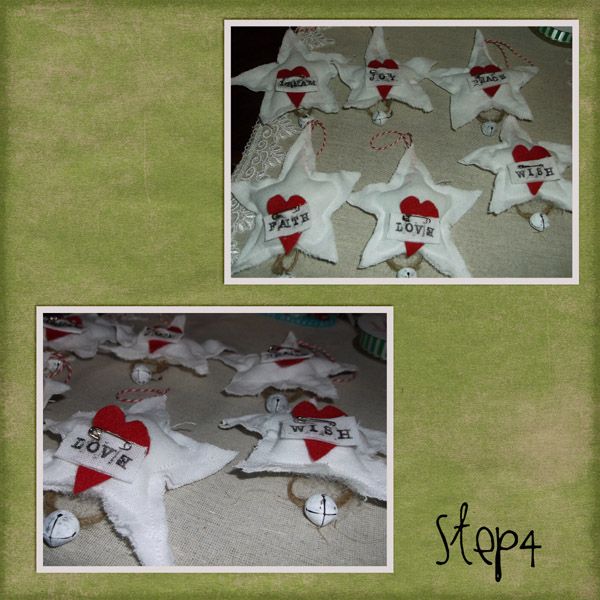
Step 5~ Now hot glue your button bow on...
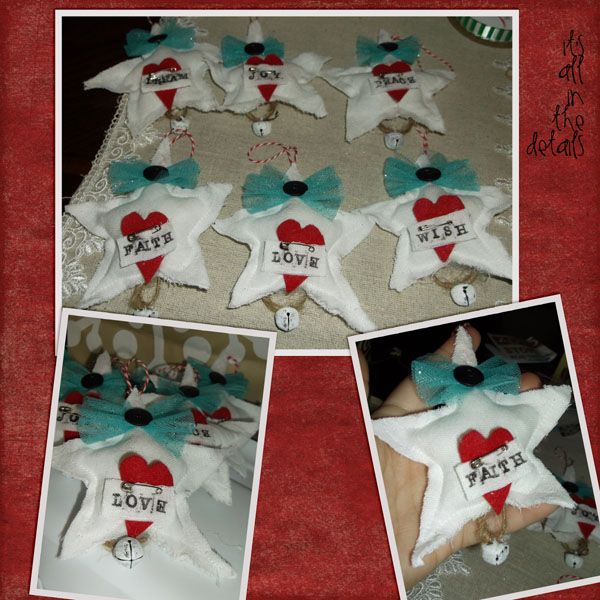
And your done!
Now it's time to put them on your tree.. or give them as pressies.
Sadly my tree isn't up yet. I did go & get it yesterday and haul it up to my house... but it's now sitting on the floor. I was being lazy & watched all 13 episodes of Z Nation yesterday..
I know not very christmasy . This year I'm having a hard time getting into the christmas spirit.
But i'm working on it =D
If you make one of these ornies, or wanna share some project your working on, or have a question
feel free to leave me a comment.
You can see my pintrest board here. You can follow me !
just click here...
Next up sweet lil owl feltie ornies... so until next time.

Happy craftin Ya'All!
Gorgeous ornaments! I think I'm going to try making these... I can see how you could keep changing them up to go with your current theme too. :)
ReplyDelete