
It's another Make it Monday!
As you know I started redecorating my laundry room shabby chic.
Sometimes being the only girl in a house ... SUCKS!
Quite awhile back while at a thrift store with my mom , I came across a really cute little suitcase.
It was pink and had something on it about going to grandmas. But the shape and size was super cute.
And it was priced at $1.95 and was half off... so about a buck!
I forgot to take a before pic (boo) but I found one online...
Here's what it looked like before
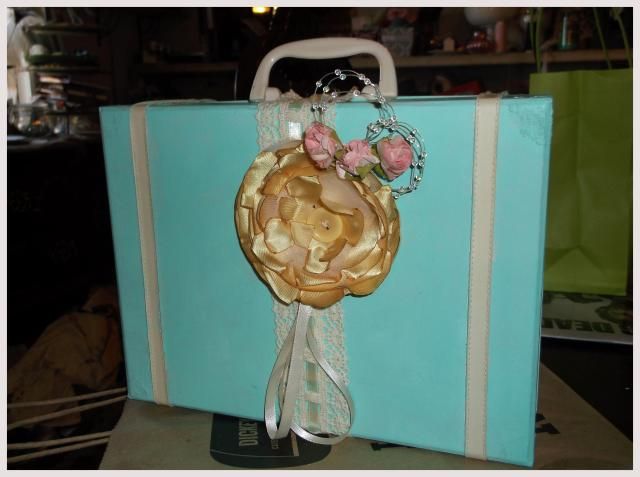
 I took some acrylic paint ( light turquiose), and painted the whole suitcase minus the
creamy handle & leather straps down front, and hardware. (mine didnt have those corner peices)
I had to do a couple coats so the picture didn't show through. The apint dries super fast though , so it didn't take to long.
I took a piece of lace and measured so that it fit from the hardware at the top to the bottom where the seam is, plus a little extra. I then folded over so that the lace didn't have a jagged edge, and glued that down using E-6000 glue. Then glued it down the middle and did the same at the bottom.
I then made a flower cluster.
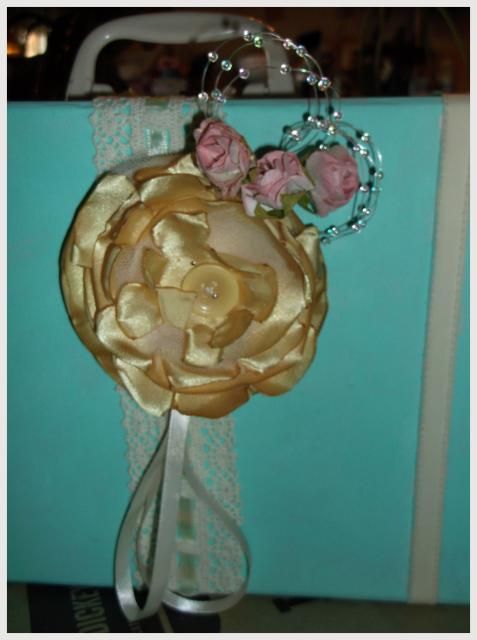
To make my yellow flower. first you need some silky type of material.You need to decide how big you want your flower. Then cut out different size circles, Starting with the size you want and makeing the next smaller and the next smaller, and so on.
Take your first one and grab a tea candle. Light it! Now very carefully singe the edges around the flower so they curl. Be careful with this part. you dont want to get the edges on the actual flame just the heat. it can catch fire. If that happens just remove it and blow it out or snuff it out with your finger. When the flower edges is singed all around, put it to the side.
Now grab the next one. With all the rest except the 2nd to smallest size, you are going to make petals to give the flowers depth.
So take some scissors and make 4 cuts from edge to almost but not quite the middle ( we dont want them cut apart.) Now singe the edges including the cuts. now in between those cuts make more cuts ( so your flower will be cut into 8 petals) Now singe those. Do this to all your petals except that 2nd to smallest peice. That one you are going to do the same as the first... just singe around the edge.
Now starting with the largest piece place them all on top of each other, down to the smallest petal. Grab a needle and thread and sew them together. doesn't take much a couple stitches. Now I used a button for the middle of my flower, but you could also use a fancy rhinestone, or beads or whatever you want in the middle. Attach it to your middle and that part is done.
NOTE:( this is how I make some of my hair flower bows, just cut a small piece of felt in a circle,
hot glue it to the bottom, hot glue a clip and hot glue another piece of felt over the hot glued part of the clip to finish it .)
Now take a piece of felt and cut a circle about half as big as your biggest petal. I took some old ribbon roses I had and some bead sprigs. I figured out how I wanted to place them then hot glued them to the felt. Then hot glue your flower on those. Now hot glue your flower cluster to the suitcase. I placed mine not quite to the top on my ribbon but close to it. I also added a couple ribbon tails hanging down with some smaller ribbon.
And thats it. I know the flower seems like a lengthy explanation but after you make a few it doesnt take very long. This project cost me very little money and took me about an hour.
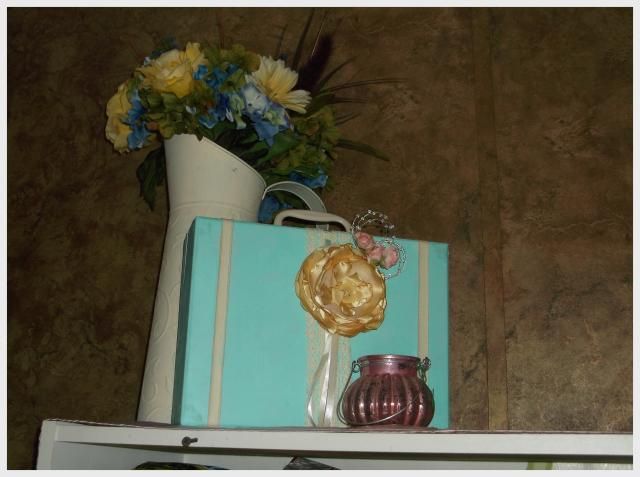
 Here is my little suitcase in it's natural environment.. heehee.
I have it placed on top of a white shelf I have in the laundry room... my next project in there!
I am going to make a faux screen door for my shelf... YEAH!
I love shabby stuff!


As you know I started redecorating my laundry room shabby chic.
Sometimes being the only girl in a house ... SUCKS!
Quite awhile back while at a thrift store with my mom , I came across a really cute little suitcase.
It was pink and had something on it about going to grandmas. But the shape and size was super cute.
And it was priced at $1.95 and was half off... so about a buck!
I forgot to take a before pic (boo) but I found one online...
Here's what it looked like before
creamy handle & leather straps down front, and hardware. (mine didnt have those corner peices)
I had to do a couple coats so the picture didn't show through. The apint dries super fast though , so it didn't take to long.
I took a piece of lace and measured so that it fit from the hardware at the top to the bottom where the seam is, plus a little extra. I then folded over so that the lace didn't have a jagged edge, and glued that down using E-6000 glue. Then glued it down the middle and did the same at the bottom.
I then made a flower cluster.
To make my yellow flower. first you need some silky type of material.You need to decide how big you want your flower. Then cut out different size circles, Starting with the size you want and makeing the next smaller and the next smaller, and so on.
Take your first one and grab a tea candle. Light it! Now very carefully singe the edges around the flower so they curl. Be careful with this part. you dont want to get the edges on the actual flame just the heat. it can catch fire. If that happens just remove it and blow it out or snuff it out with your finger. When the flower edges is singed all around, put it to the side.
Now grab the next one. With all the rest except the 2nd to smallest size, you are going to make petals to give the flowers depth.
So take some scissors and make 4 cuts from edge to almost but not quite the middle ( we dont want them cut apart.) Now singe the edges including the cuts. now in between those cuts make more cuts ( so your flower will be cut into 8 petals) Now singe those. Do this to all your petals except that 2nd to smallest peice. That one you are going to do the same as the first... just singe around the edge.
Now starting with the largest piece place them all on top of each other, down to the smallest petal. Grab a needle and thread and sew them together. doesn't take much a couple stitches. Now I used a button for the middle of my flower, but you could also use a fancy rhinestone, or beads or whatever you want in the middle. Attach it to your middle and that part is done.
NOTE:( this is how I make some of my hair flower bows, just cut a small piece of felt in a circle,
hot glue it to the bottom, hot glue a clip and hot glue another piece of felt over the hot glued part of the clip to finish it .)
Now take a piece of felt and cut a circle about half as big as your biggest petal. I took some old ribbon roses I had and some bead sprigs. I figured out how I wanted to place them then hot glued them to the felt. Then hot glue your flower on those. Now hot glue your flower cluster to the suitcase. I placed mine not quite to the top on my ribbon but close to it. I also added a couple ribbon tails hanging down with some smaller ribbon.
And thats it. I know the flower seems like a lengthy explanation but after you make a few it doesnt take very long. This project cost me very little money and took me about an hour.
I have it placed on top of a white shelf I have in the laundry room... my next project in there!
I am going to make a faux screen door for my shelf... YEAH!
I love shabby stuff!
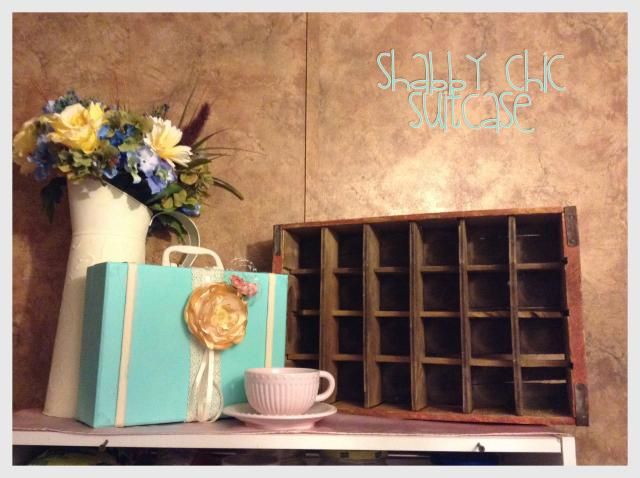
I decided to put up my vintage coke box and added a vintage tea cup instead.
Hey a girl can change her mind. lol
If you have any questions or comments , please feel free to leave them below... and if you see any
neat ideas.. SHARE!
Happy Craftin Ya'All!
Until next time ...
No comments:
Post a Comment