
It's monday (yeah i know i already posted one but I havent in a while... so BONUS!), so that means another
MAKE IT MONDAY!
I love love LOVE shabby chic/ junktique stuff! I love wandering around flea markets , getting ideas , drooling.. and being craftsy helps cuz alot of the times I can recreate what I saw.
I found this picture on pintrest and fell in love

I went to the link and it took me to another site.. you can visit her blog & tutorial HERE!
So I decided to give it a try. Our house is a manufactured home, We have those frosted globes that are stuck to the ceiling for lights... not very pretty. So I thought this would give more light & look better for our laundry room.
The hardest part of this whole project was finding a dang hula hoop in winter! I finally found one at a dollar store. The fencing I found on clearance at a dollar general for like 70 cents.
So here we go....
first you want to gather up all your supplies
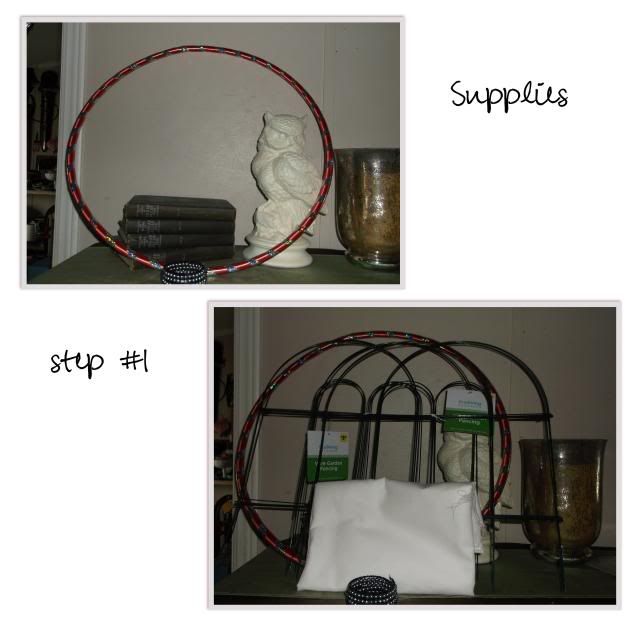
Your going to need
* hula hoop
*material- mine is just cheap white material
* garden fncing
* chain to attach to ceiling
*tools- scissors , needle nose pliers, hot glue gun, some wire
Next
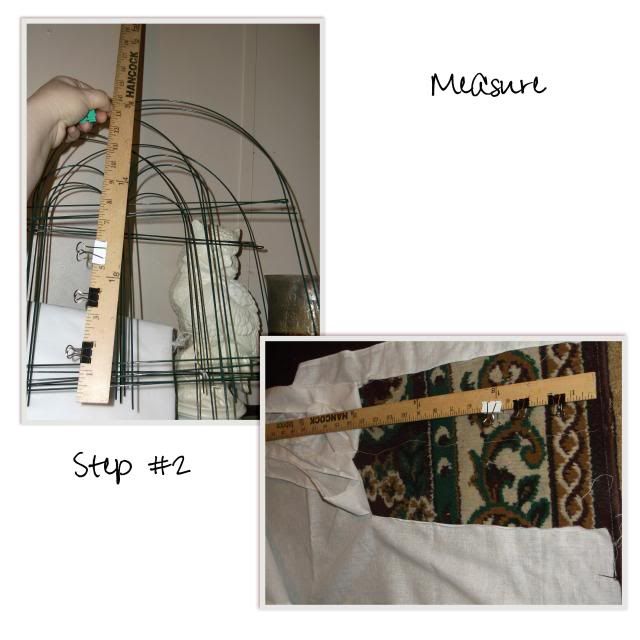
Now your gonna wanna measure how long to cut your strips. Mine were 2inches wide by 13 inches long. i cut a small snip then ripped the rest of the way so I would have those tattered edges.
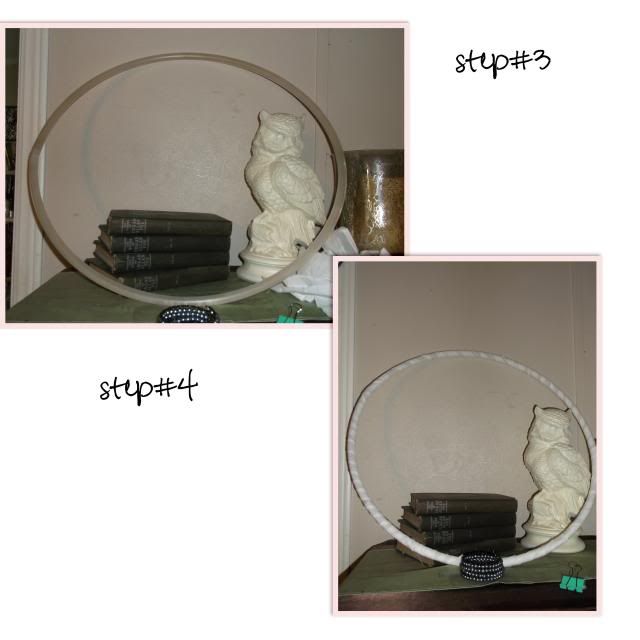
Next I had to take off all that ribbon on the hula hoop.. they really dont want it coming off!..
Then I ripped a loooonnnnggggg section and wrapped and hot glued it to the hula hoop. til it was all covered.

Now take your garden fencing and measure it to the hula hoop. Cut off any excess.
Take your glue gun and run a little on the straight part... not to far or it will dry before you get to it. you want the fencing to be rounded side down. Glue the strips with a tiny bit sticking out of top. Cover the whole line.
And remember to peel the burning hot glue off your fingers .. my hot glue gun & I have a love hate relationship lol.
When that is done you want to cut a piece of wire , long enough to wrap and twist to keep your hula hoop and fencing together. I started in one place & attatched it every so often to keep its rounded shape.
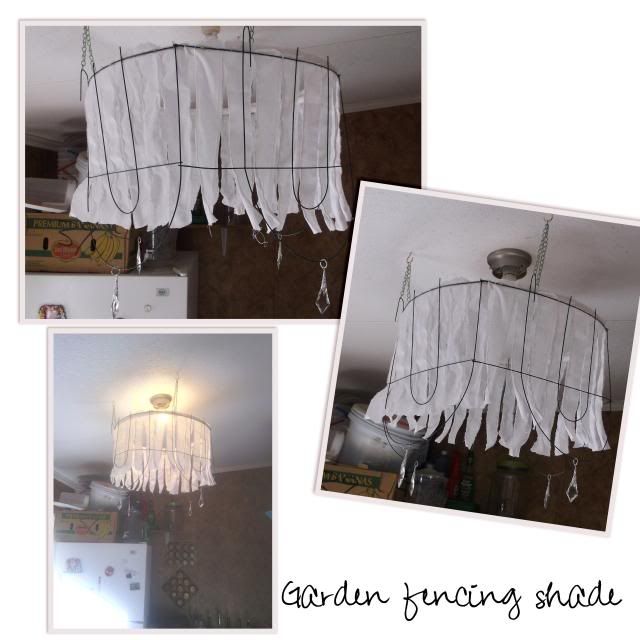
Then you are going to want to take your needle nose pliers and make loops out of the part of the fencing that would normally stick in the ground. this is what you will place your hanging chain into. I have seen people add these to a hanging chandelier but since mine was a flat light I had to improvise. I used cup hooks in ceiling and then attached chain to that. I also thought it looked a bit plane so I took some crystals from a chandelier that I previously made but wasnt using and hang them on the rounded parts. You will have to kind of mess with the fencing to make it a roundish shape... it doesnt want to be round lol. (you can tell in the picture the one with the light on it has a bit more round to it)
And here is my finished project....
Voila!
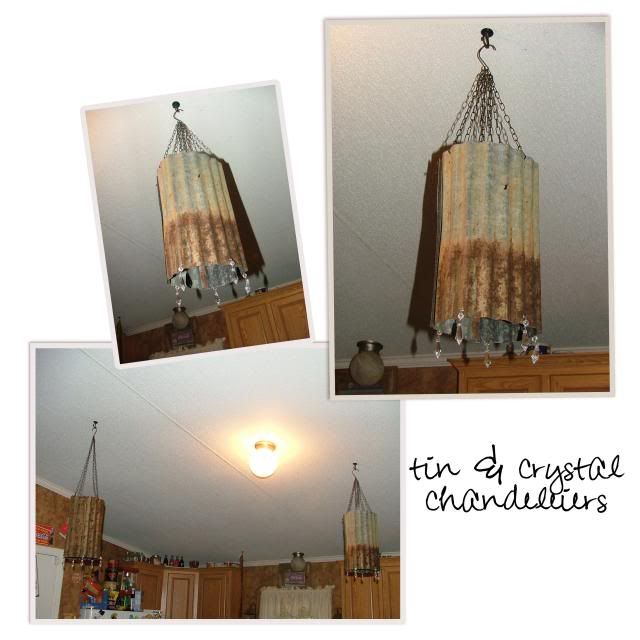
& since Im posting I wanted to share some tin chandeliers we made in 2012... these babies hang in my kitchen, I saw some hanging in our area flea market.. and was OBSESSED. they were just a display wasnt selling them then.. they do now. I thought it couldnt be too hard so hubby helped me & I love the results
Happy Crafting Ya'all!

No comments:
Post a Comment