
It's make it monday time again. I almost forgot today was monday. lol
Today Im gonna share a little project I made for my little sisters 26th Birthday .She loves owls so I
decided to make her an owl apron for her and one for her 2 little kidlets... and since she was getting aprons, she needed some place to hang them. Today I'll show ya how I made the holder next week...
the aprons!
There are soo many great owl nail art ideas on pintrest , so I kinda had an idea of what I wanted.
Here's some inspiration


You can click on any of these lil guys to go to the original blogposts!
So I wanted to make my holder rustic looking, but I needed it light enough to be put on an
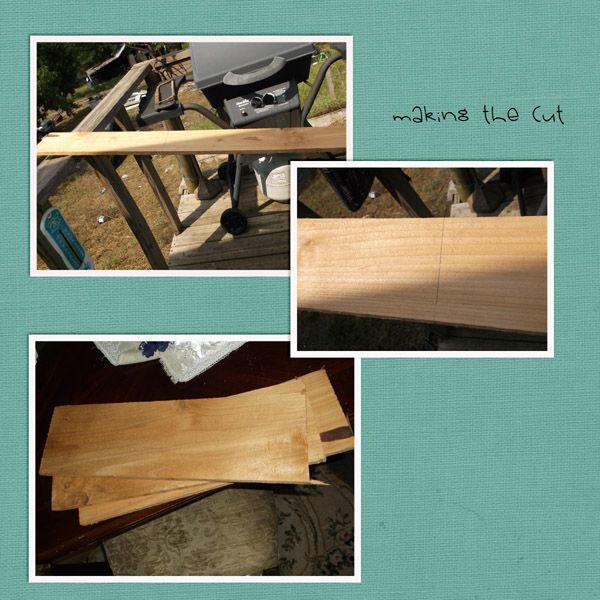
apartment wall. I bought a peice of fence board at lowes for less than $2.
I measured 22 inches and marked the board... x's3
and cut them out
STEP ONE
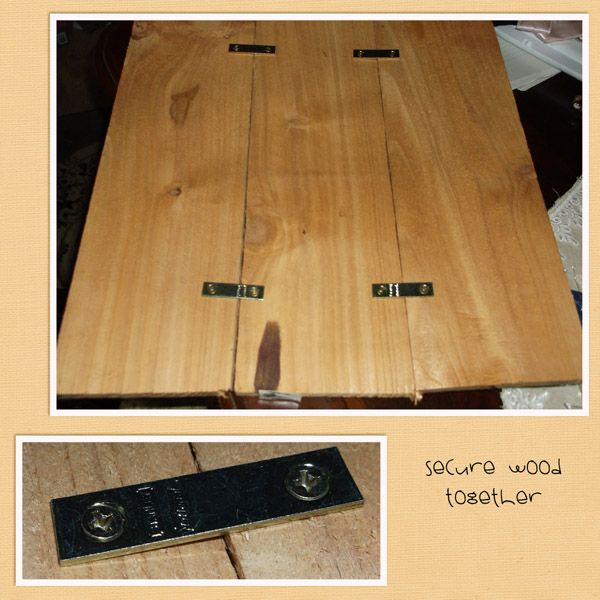
While at lowes I also bought some little straight hinge type things with holes in either side
(okay i know its not that technical but i am not a carpenter)
I fixed the peices that werent straight.I placed my boards side by side and took my hingey things and screwed them together to hold the boards. when that was done I noticed that it wasnt very sturdy , So I took an extra piece of 1x1 wood I had laying around and cut it to fit the boards.I attached the board with screws These stuck out a little on the front . So my hubby took a grinder & grinded them down for me.
STEP2
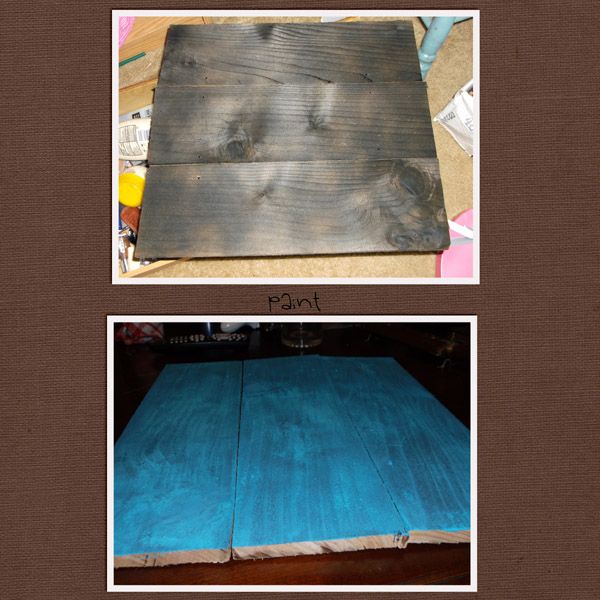
If you read any of my blog , you know I like shabby chic type of stuff.
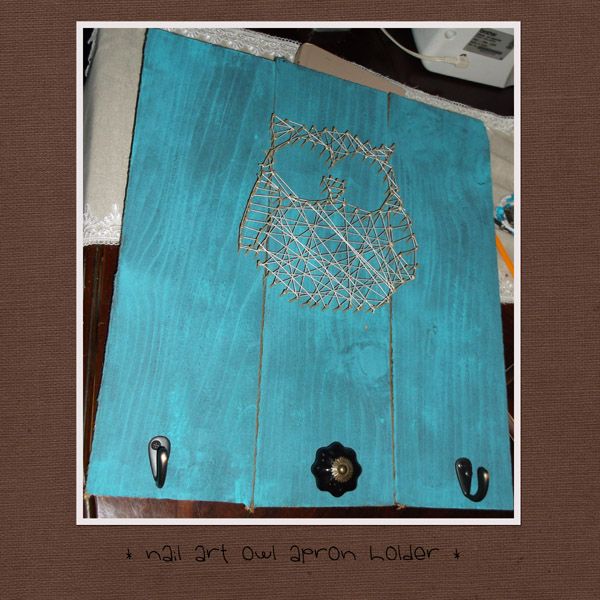
I spray painted the wood black , not all the way just enough to cover it roughly. you could still see some of the wood through parts.
Then I took some apple barrel acrylic paint in caribbean blue and painted one coat over it.
this gave it a rustic look.
STEP THREE
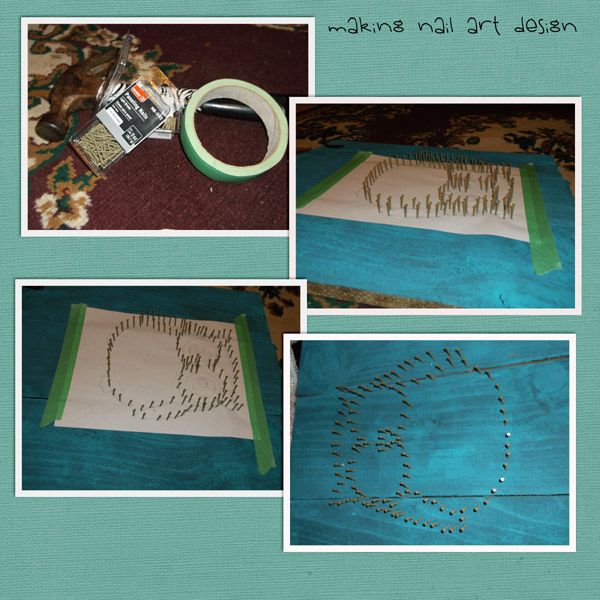
Now it was time to make my nail art . I looked for a picture of a pretty plain owl. Found one I wanted and since the printer is hooked up to hubbies computer I just traced it from my computer screeen.
I used painters tape and taped down my pattern to the middle of the boards. Then I took wire nails
and hammered them partially in all around my pattern and where I wanted the nail art to be.
Since my wood was not in one piece I found that some of my nails had to be fixed so they would stay in place.
STEP4
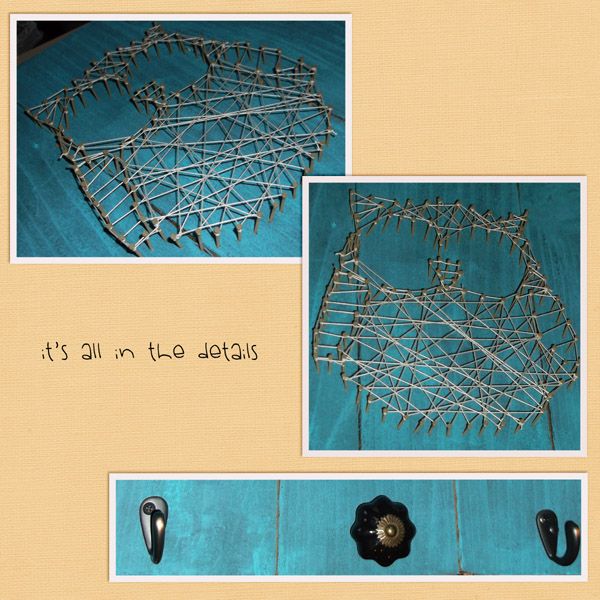
To make the string art I double tied my embroidery thread to one nail and started to make my outline. I wrapped my string around each nail on the outside making sure to circle each nail with the string .
When my outline was done I took my string and just crisscrossed making different designs.
This is really up to you how you want to make it look. and if you dont like how it turns out undo parts and redo it. I just looked at lots of different string art and just started making designs with it . when your satisfied. tie off your string in a double not.
Now since this is an apron holder, it needed... holders lol
I had 2 hooks from a project long since done, but I needed 3. So I bought an antiquish door knob
from hobby lobby for 50%. I drilled a hole in the middle bottom part and placed the knob . I the screwed in the two hooks on either side.
~DETAILS~
I was pretty happy with how it turned out and my sister looked like she liked it too lol
Don't forget to come back next week to see how I made owl aprons. And if you have any crafts you
wanna share please leave me a comment... and follow me on PINTREST!
No comments:
Post a Comment