Yeah!
It's make it monday time again!
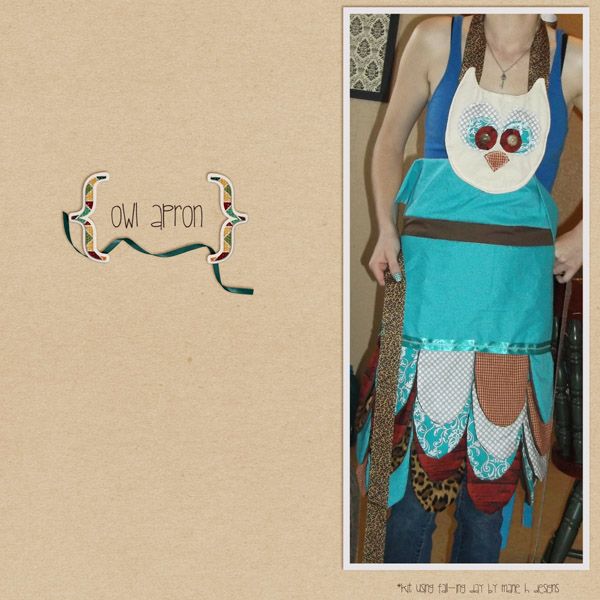
Today im gonna share how I made my little sisters owl apron for her 26th bday!
My sister LOVES owls. so while I was looking for ideas for her bday on...
Yes you knew I was gonna say it...
PINTREST.
I found this sweet little owl apron made for a toddler.
(click on pic to be taken to original blog post)
Now my sister is tiny enough to wear childrens stuff.. however I knew I needed to make it a bit bigger for her. My sisters also does alot of crafty stuff with my little nephews .So I thought why not
make them one too!
and since I was making them for boys too, I knew I couldn't have to girly material.. sorry sis.
so lets get started...
Here's what ya need
- eyes face beak pattern
- feather pattern
- 6 fabrics 1/2 yard each (this can make 2 full aprons)
- 1/4 yard fabric for the owl face
- 1 roll grossgrain ribbon
- wonder under
- 2 fabric Yo Yo’s (optional)
- iron
- sewing machine and supplies (scissors, seam ripper, etc.)
- click on patterns to go to the download link- (I made my sisters a little bigger)
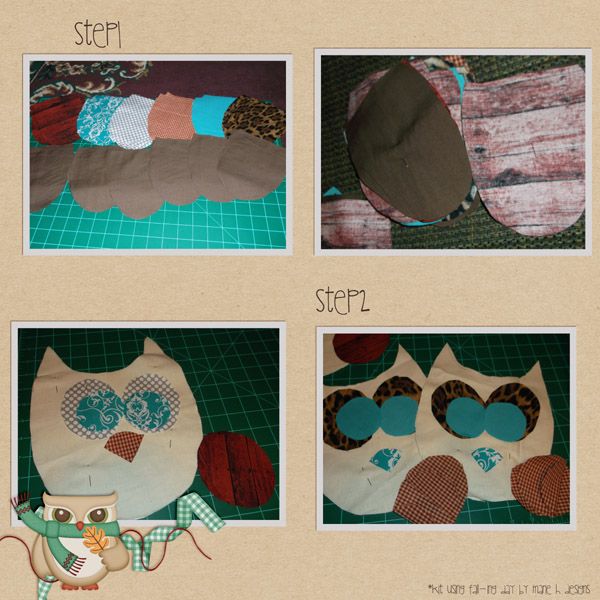
Step 1
To start out you first need to cut all those feathers out.. and making three aprons that was ALOT!
I used a plain material for the back of each feather as you can't really see it anyways.
You should have 6 different patterns for material. You will need to cut out
4 of each and 24 of plain material (or 8 of each patterned material if your doing it that way)
You should have 48 feather peices when your done.
Step2
Now its time to work on your faces. You are gonna need 2 of the face cut. I used flannel for one side and a canvasy type material for the front. but you can use the same material for both sides.
The pattern has 3 size eyes. I didnt use the smaller one. I cut 2 of the biggest for the
first part of the eyes. 2 of the middle size for the 2nd part . and I cut 2 more of the bigger for the yoyo's . The material you use for this depends on how you want your owl to
look. I used the same material as the feathers. and don't forget your beak!
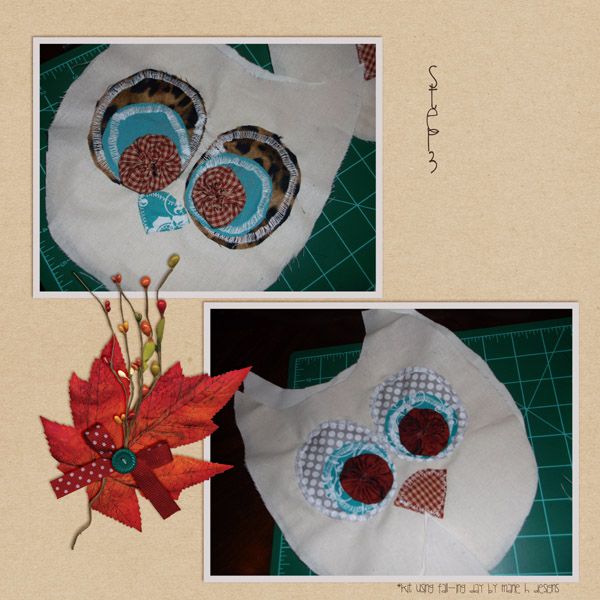
Step3
Now before you sew your head pieces together. you are gonna wanna sew on your eyes.
place your eyes and nose where you want. you may want to use something like wonder under to
hold in place.
Stitch around your eyes and nose using zig zag stitch( width set at 7.0 mm & length set at 0.5mm and tension set to 4.0)
Make 2 yoyo's ( cut out the biggest size circle and hand sew straight stitch around the edges of circle. Then pull so that it closes in on itself making a pouch looking thing, pull until the hole in the middle is closed. knot together and flatten out making a circle that looks "puckered", mess with it until you get it the way you want.) and sew it onto eyes.
Now sew a button in the middle of your yoyo.
place the 2 right sides together and straight stitch around edges making sure to leave an opening so you can pull it inside out the right way. Sew the opening together. Now straight stitch around entire thing.
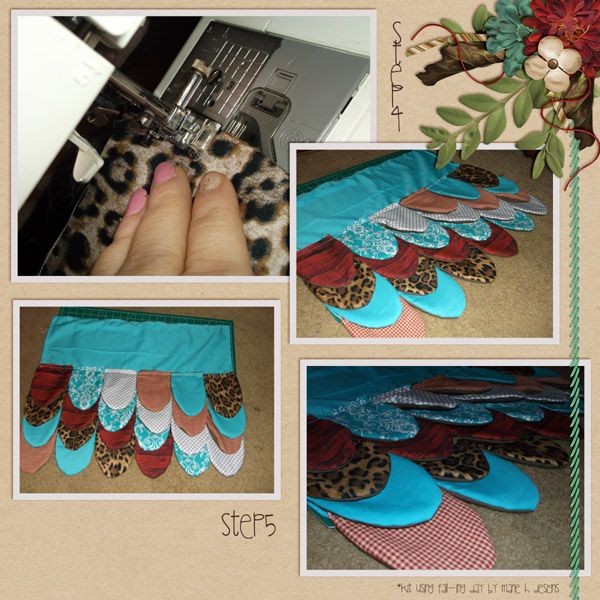
Step4
Do you remember all those feathers...
Your gonna take 2 feather peices (either 2 of same or one plain /one pattern) and put them together
right sides together. Sew them together leaving flat space at top open.
turn
inside out. Iron. now you have a choice you can straight stitch around
entire thing including the top to close it or leave them. I chose to
leave them.
You should now have 24 feathers. 4 from each pattern.
Step5
Now take your finished feathers and separate them into 6 piles of like patterns.
You are now going to make the pattern you want by placing them in order , using 1 of each of the 6 patterns. Lay them in a row of how you want your patterns to go. Now make another row but this time move patterns over one. continue to the next row doing the same... and the same for the 4th row.
...it should look like this
123456
234561
345612
456123
Now your gonna need a body to sew everything to. Take a plain piece of material and cut
it 16" high and 21" wide and sew a 1/4" seam all around it. Now for my sisters i needed it bigger so I sewed a peice of another material in the middle and then made another piece of the body for the top. I guesimated for this for how big my sister was.
Now take those feather lines and starting with the bottom (456123) and place them across bottom of the body. Pin in place and straight stitch across the tops. Now take your next line (345612) and place them above the first layer. makign sure they are up enough to overlap but not cover them.. Pin & sew.
do the same with each line (all 4 lines should now be sewn onto body.)
Now take your owl head and place it so it overlaps just a little bit with the body in the direct
middle top. use a little wonder under where the material attaches.. and sew the face on to the body following the edges.
Take some grosgrain ribbon and cut 2 pieces for the back ties (I singed the ends so they didn't unravel or fray) Sew to the middle of your "body" Make sure you have enough to go around and
being able to tie. Now take and cut two more for the neck ties (singe edges so don't fray). Sew those to the owls ears...
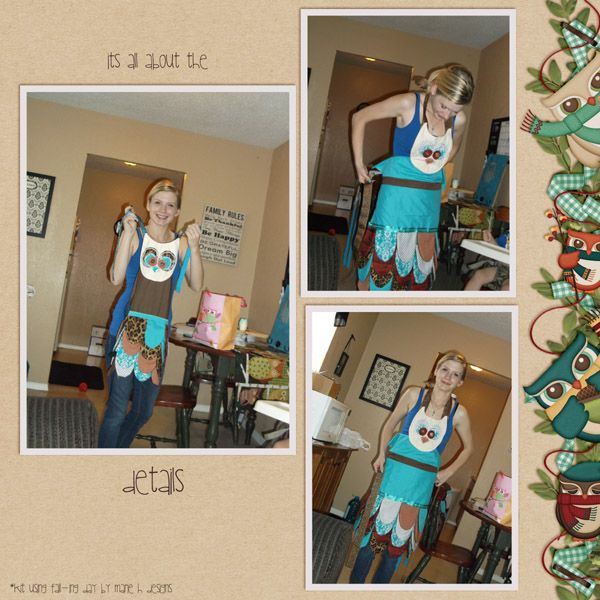
and your done! I love how cute this turned out. If you are wanting more of an "adult" apron you can always just make the feather part.. but I like the owl face lol.
I think my sister did too!
The original blogger made this for her 3 year old, the pattern says its for a 10 year old. I followed the pattern for my 4 & 2 year old nephews. So this is something they can grow into. I also didnt zigzag right on the exact edges of the eyes as I wanted it more rustic. And I sewed a silky ribbon across the top of my upper line of feathers.
Enjoy!
As always please feel free to follow me on PINTREST .
If you make a apron I'd love to see it. Please leave me a comment or message me if you
have any ?questions?
Happy Craftin Ya'All!


